Music production for guitar has a lot of options on Linux. We will see how to install the required software, and how to use Guitarix together with Ardour either with the standalone version of Guitarix or with an embedded version inside Ardour.
Software installation and configuration #
Install Ardour, a music production software under the GPLv2 license. For Archlinux run:
sudo pacman -S ardourFor other operating systems you can follow the Ardour installation page or on flathub.
Install qpwgraph to visualize pipewire connections. So this is not mandatory but highly recommended to make sure Ardour, Guitarix and their respective inputs and outputs are wired correctly.
sudo pacman -S qpwgraphMake sure your user is in the audio and realtime groups:
sudo usermod -a -G audio $USER
sudo usermod -a -G realtime $USER
and set the real time priority and memory of the audio group in /etc/security/limits.d/audio.conf:
@audio   -  rtprio     95
@audio   -  memlock    unlimited
Start Ardour, select “Recording Session” and select only one audio input.
Guitarix as a standalone program #
We will first see how to use Guitarix as a standalone program. Guitarix is a virtual amplifier released under the GPLv2 license which uses Jack to add audio effects to a raw guitar signal from a microphone or guitar pickup.
To install Guitarix on Archlinux run:
sudo pacman -S guitarixOther installation instructions are available on the Guitarix installation page or on flathub.
Starting Guitarix shows the main window. The left panels shows the effects available, which can be dragged onto the main panel to put them on the rack and change their settings.
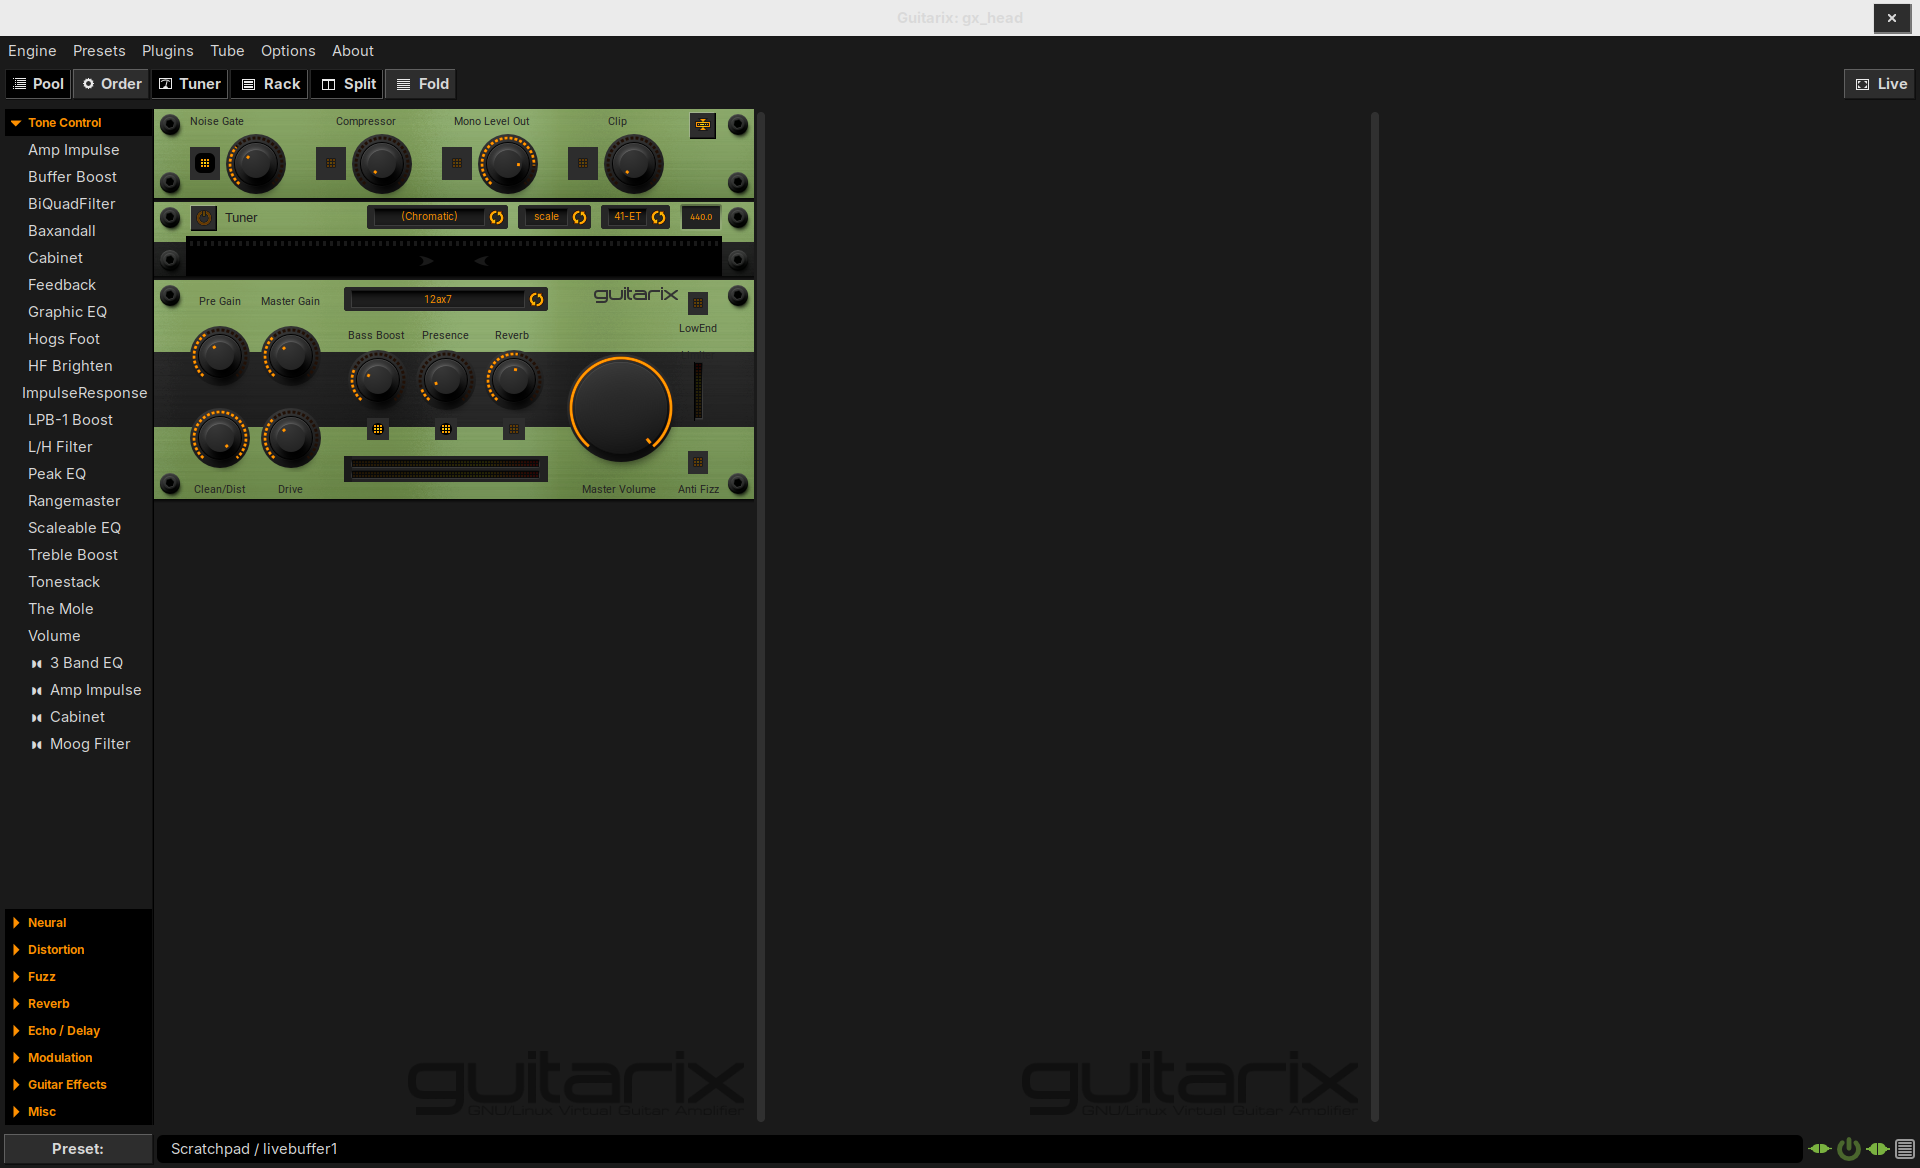
Guitarix main window.
To configure Guitarix’s input and output, go to the “Engine” menu and click on “Jack Ports”. The inputs should be the guitar pickup and microphone, and the output should be Ardour “audio_in”. Make sure Ardour is started so that it can be selected in the output section.

Jack Input and Output selection in guitarix.
The Guitarix output configuration can be checked on the Ardour side as well. In
Ardour, select the “Rec” tab (with the button in the top right corner) and
choose the routing grid option using the third button of the “Audio 1” row. This
will display a routing grid where you can check whether only the output of Guitarix
gx_head_fx is selected.
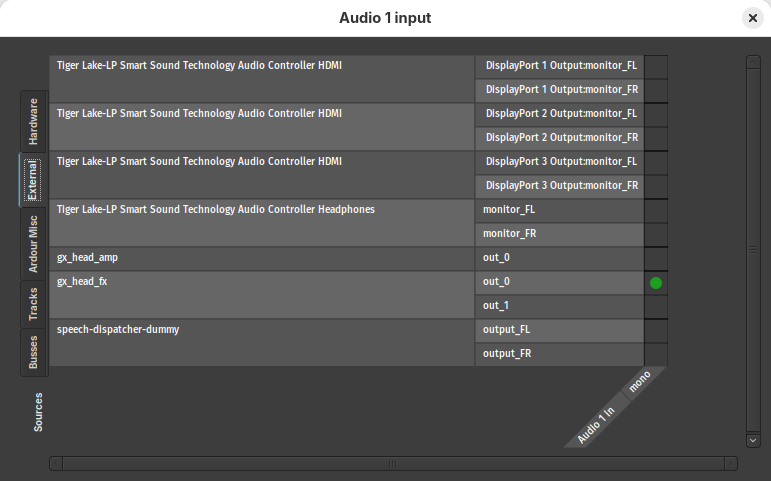
Routing of Audio 1 where the guitarix output is selected.
The jack graph of this setup will see the guitar pickup or microphone connected
to Guitarix, the Guitarix output connected to Ardour, and the Ardour output
connected to the system’s playback. The graph from qpwgraph below illustrates this
configuration and allows checking for feedback loops and incorrect connections.

Jack graph connection of guitarix and ardour.
To record the Ardour output, press the red recording button in “Audio 1” row of the “Rec” tab. To monitor the audio that will be recorded (i.e. the Guitarix output), you can press the “In” button.

Audio 1 channel in the ‘Rec’ tab.
Guitarix supports Neural Amp Modeler (NAM) plugins to emulate any hardware amplifier, pedal or impulse responses. NAM models can be downloaded on ToneHunt and loaded under the “Neural” section in the pool tab.
Guitarix as a plugin inside Ardour #
Guitarix exists as a VST3 plugin for music production software. The plugin shares its configuration with the standalone Guitarix app, so Guitarix presets and settings from the standalone app are available in the plugin.
Install the plugin on Archlinux from AUR:
paru -S guitarix.vstor head to the project repository for builds for other operating systems.
To load Guitarix as an Ardour plugin, go to the “Mix” tab (in to top right corner), then right-click on the black area below the fader and select “New Plugin” and “Plugin Selector”. The “Guitarix” plugin can be inserted on the newly opened window. Double-clicking on Guitarix open the plugin window, which roughly looks like the standalone program. Effects can be added using the “plus” symbol next to the input and AMP stack boxes. Community-made presets can also be downloaded using the “Online” button.
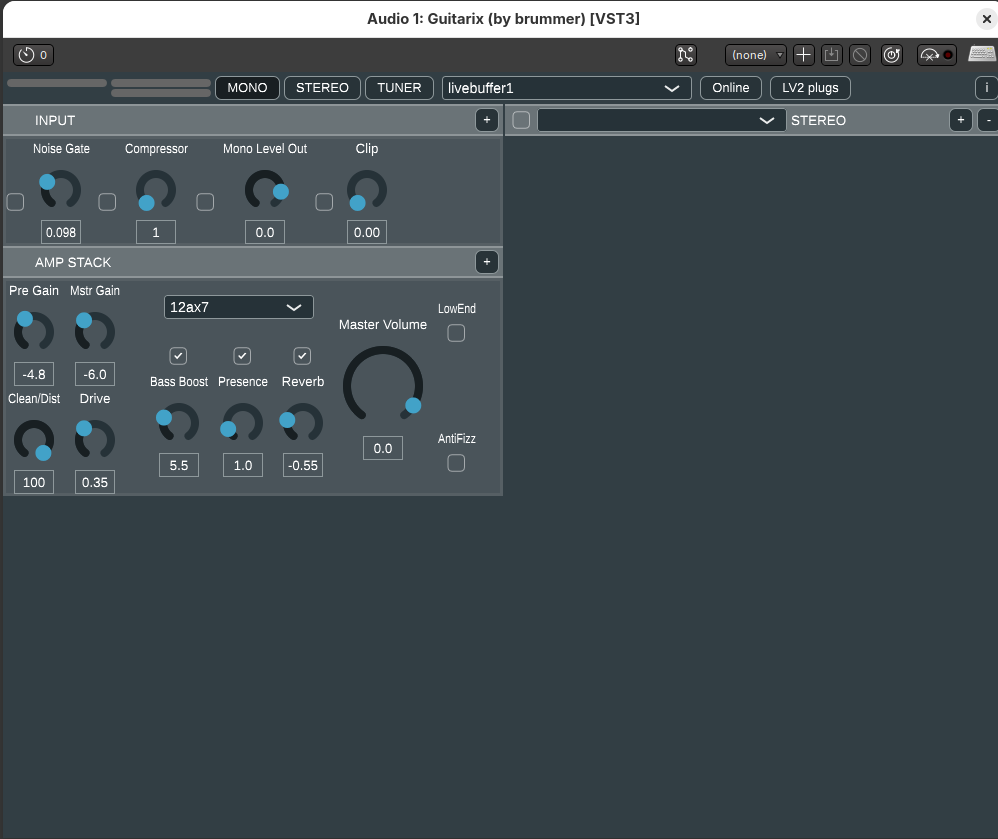
Guiatix plugin within ardour.
If Guitarix is used within Ardour as a plugin, the Ardour input (i.e. in this example the microphone) must be selected in the Routing grid of the audio track. The jack graph of this setup looks simpler, as the microphone is directly connected to the Ardour audio track.
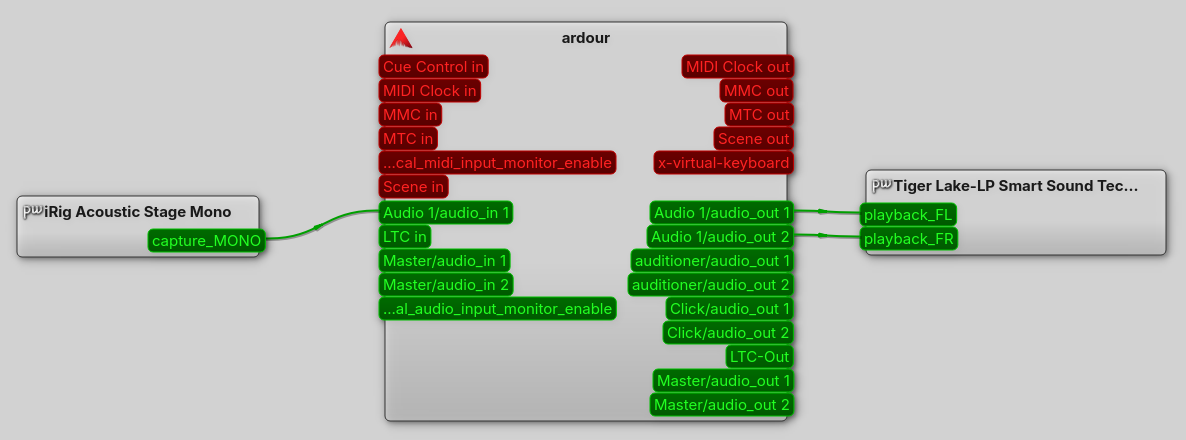
Jack graph of Ardour without Guitarix.
Record and export the recordings
To do recordings, go the “Rec” tab and make sure the audio track has the red “record” button checked. Then go to the “Edit” tab, click on the global “Toggle record” button, hit “Play from playhead” and there goes the music!
To export the recordings, go to the “session” menu and go to “Export” and “Export to file”. On the Export dialog, select the right file format, time span and channels and click on export.
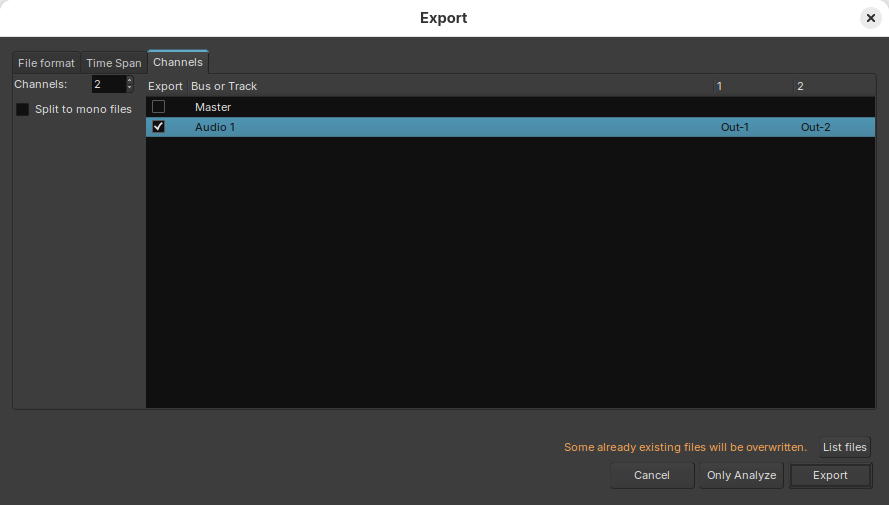
Export dialog in Ardour with channel selection.